以太坊EVM源码阅读(1)
目录
问题聚焦
- 智能合约代码在运行期间,evm做了什么?
环境准备
以太坊源码
下载 以太坊源码,我使用golang的实现。源码位置:core\vm\instructions.go。
EVM操作码查表
智能合约开发
准备 Foundry套件,智能合约开发工具套件。
初始合约项目,生成一个foundry工程。执行:
forge init hello_foundry
使用新工程中自带的Counter.sol合约测试:
// SPDX-License-Identifier: UNLICENSED
pragma solidity ^0.8.13;

contract Counter {
    uint256 public number;

    function setNumber(uint256 newNumber) public {
        number = newNumber;
    }

    function increment() public {
        number++;
    }
}
具体调试
生成函数签名
cast sig "setNumber(uint256)"

# 输出:0x3fb5c1cb
指定签名和参数,执行合约函数
forge test --match-path test/Counter.t.sol --match-test testFuzz_SetNumber -vvv --debug
执行成功以后,就可以看到evm内部执行过程图:
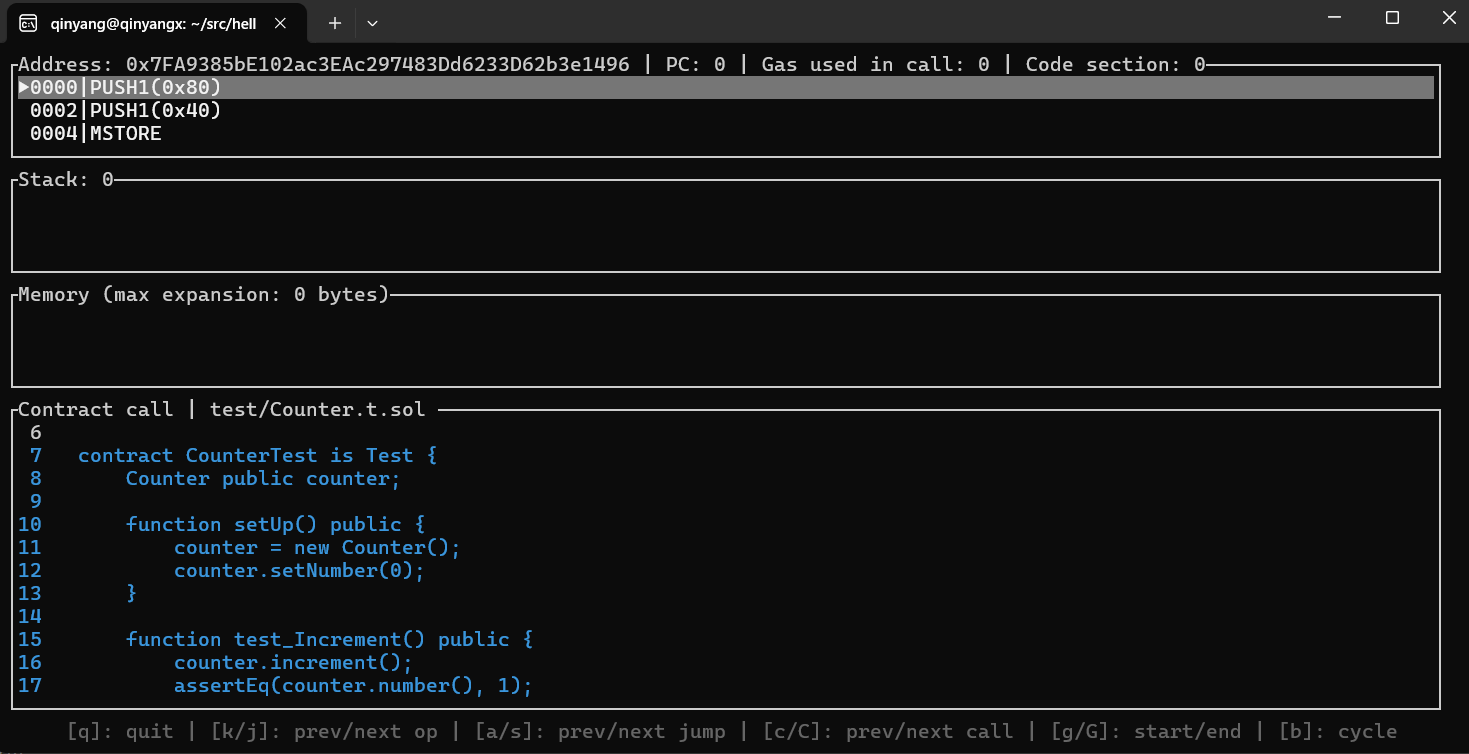
从图里看到PC程序计数器(指向下一条执行命令),Stack栈空间,Memory内存空间以及合约源码。
调试过程
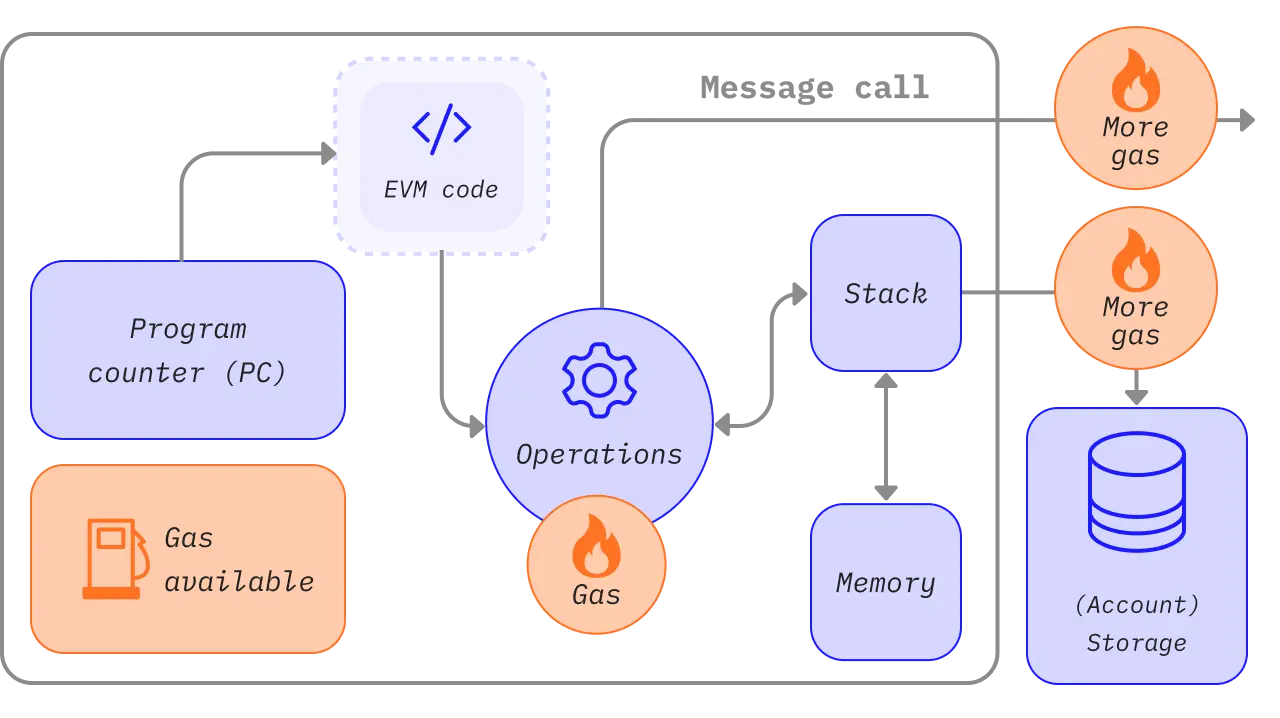
在开始之前,还是需要理解EVM运行时数据存储图:
 选自以太坊虚拟机图解
- EVM不是基于寄存器,而是基于栈,因此所有的计算都在一个被称为栈的区域执行。
- 运行时使用临时存储空间memory,合约调用完成后清空。
- 支付more gas持久化数据到storge。
执行1:
执行第1行语句:
code:
// opPush1 is a specialized version of pushN
func opPush1(pc *uint64, interpreter *EVMInterpreter, scope *ScopeContext) ([]byte, error) {
	var (
		codeLen = uint64(len(scope.Contract.Code))
		integer = new(uint256.Int)
	)
	*pc += 1
	if *pc < codeLen {
		scope.Stack.push(integer.SetUint64(uint64(scope.Contract.Code[*pc])))
	} else {
		scope.Stack.push(integer.Clear())
	}
	return nil, nil
}
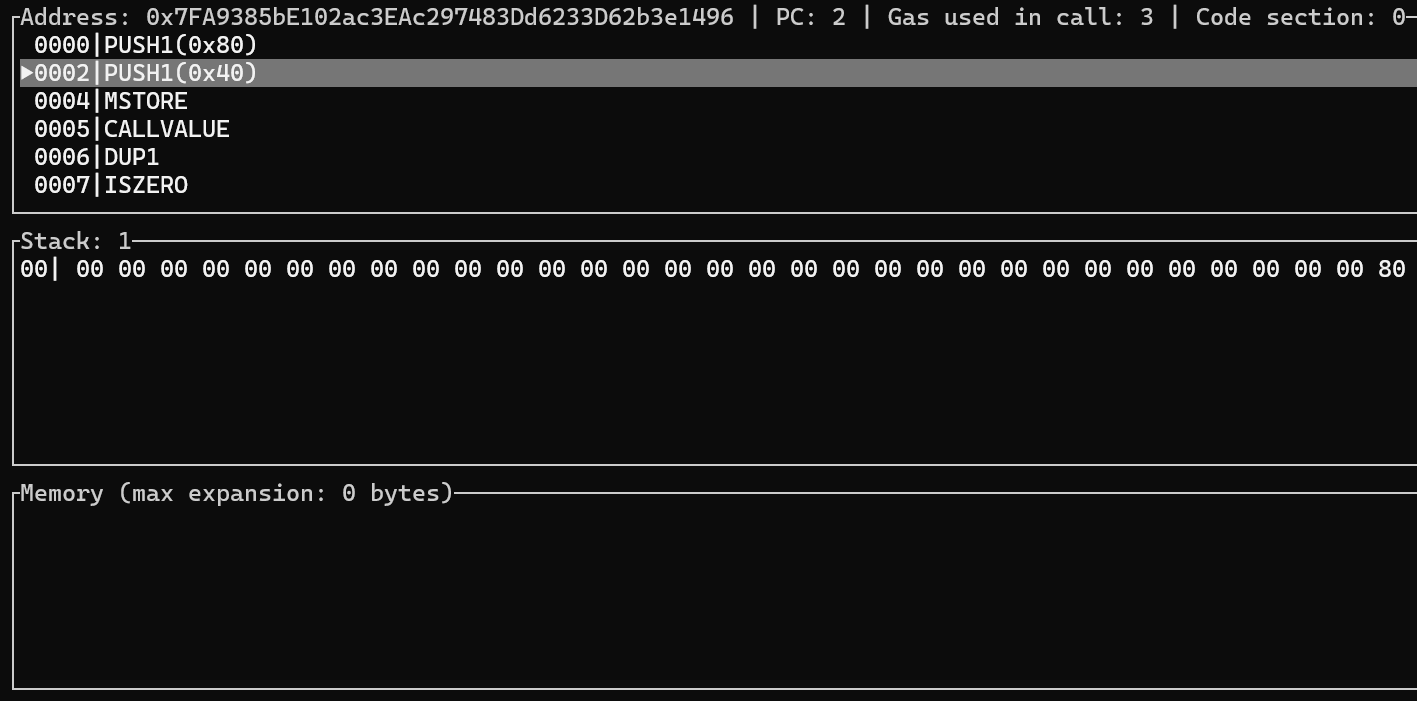
- 程序计数器+1,然后把当前程序计数器指向的代码压入stack中。
- 结果:stack中压入数据0x80
执行2:
结果:stack中压入数据0x40
执行3:
执行第3行语句:
code:
func opMstore(pc *uint64, interpreter *EVMInterpreter, scope *ScopeContext) ([]byte, error) {
	mStart, val := scope.Stack.pop(), scope.Stack.pop()
	scope.Memory.Set32(mStart.Uint64(), &val)
	return nil, nil
}
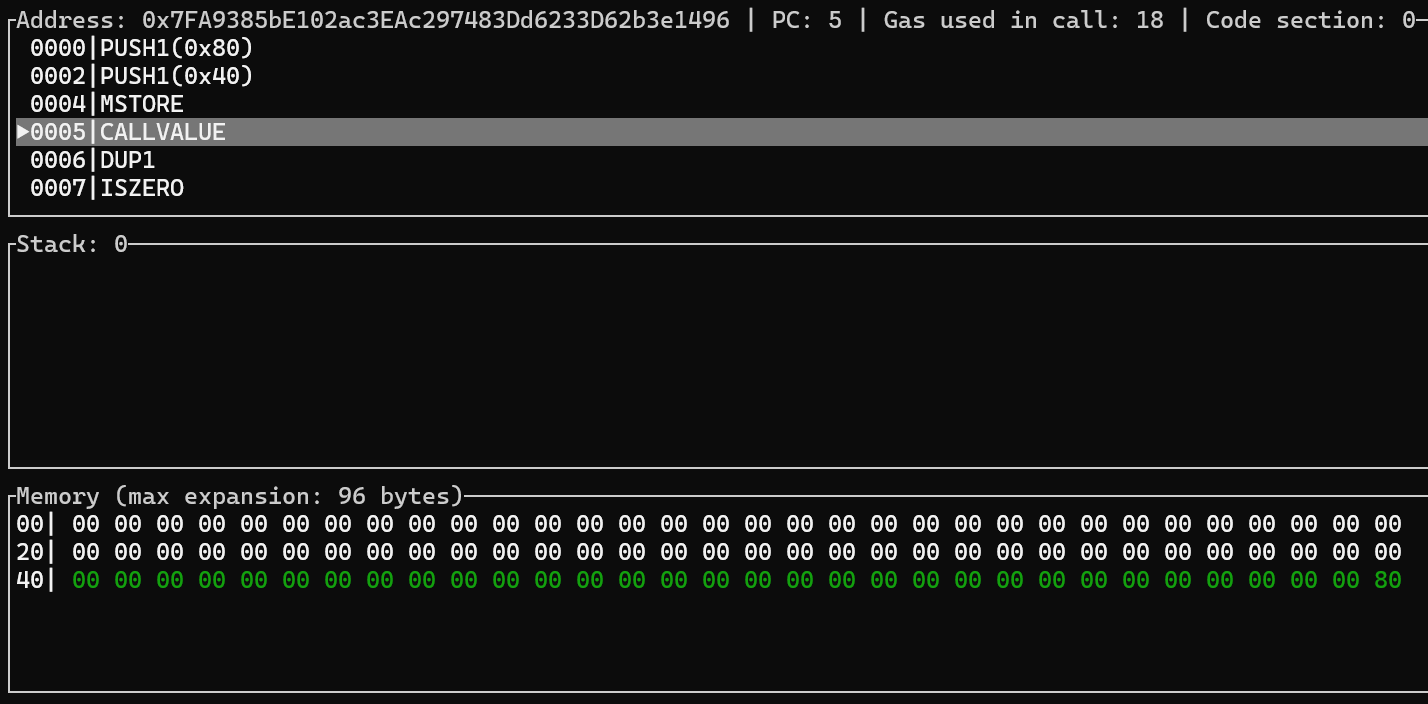
- 把stack中两个元素出栈(mStart=0x40,val=0x80,先进后出)。
- 再memory中,0x40位置写入数据,0x80。
执行4:
执行第4行语句:
func opCallValue(pc *uint64, interpreter *EVMInterpreter, scope *ScopeContext) ([]byte, error) {
	scope.Stack.push(scope.Contract.value)
	return nil, nil
}
- 把value压入栈,value指调用合约时传入的以太币的数据量。
- 当前调用,并没有发送以太币,所有值为0x0。
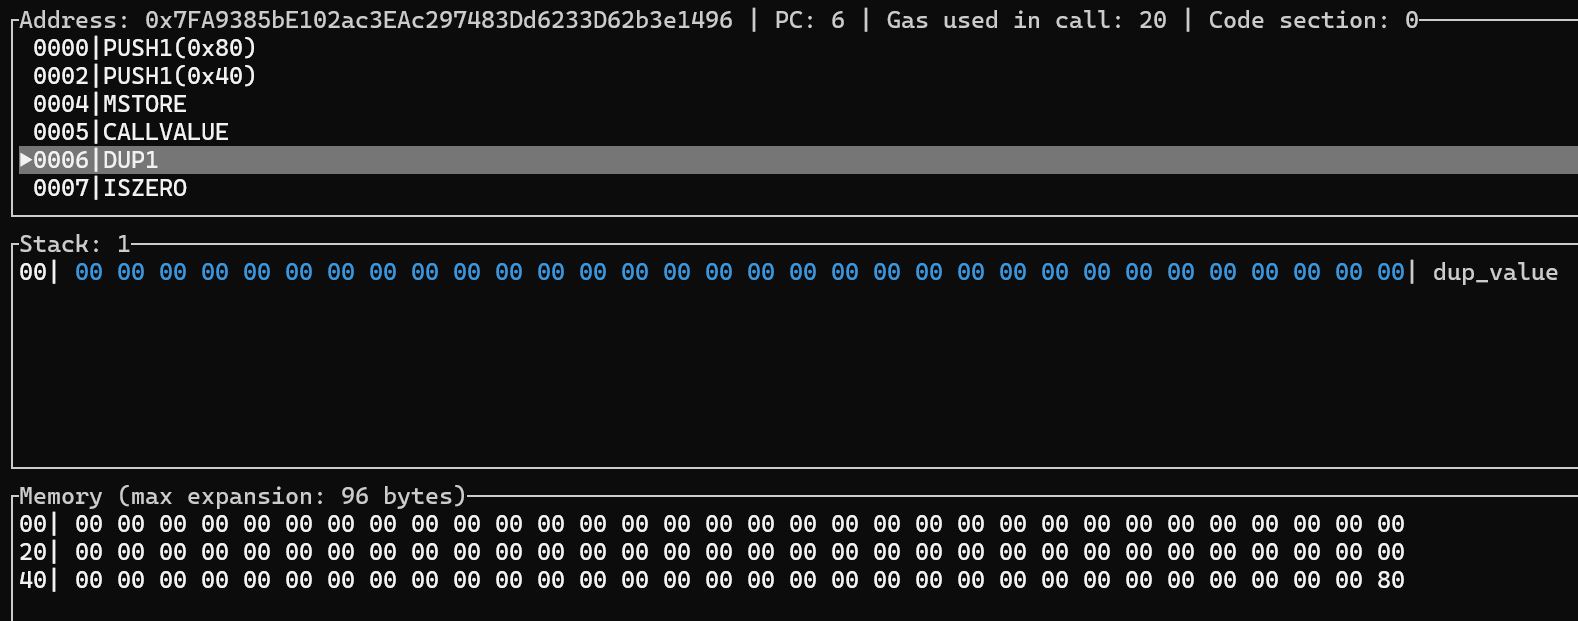
执行5:
执行第5行语句:
... (jump_table.go)
		DUP1: {
			execute:     makeDup(1),
			constantGas: GasFastestStep,
			minStack:    minDupStack(1),
			maxStack:    maxDupStack(1),
		},
...

...
func makeDup(size int64) executionFunc {
	return func(pc *uint64, interpreter *EVMInterpreter, scope *ScopeContext) ([]byte, error) {
		scope.Stack.dup(int(size))
		return nil, nil
	}
}
...
- 复制栈顶元素,入栈。
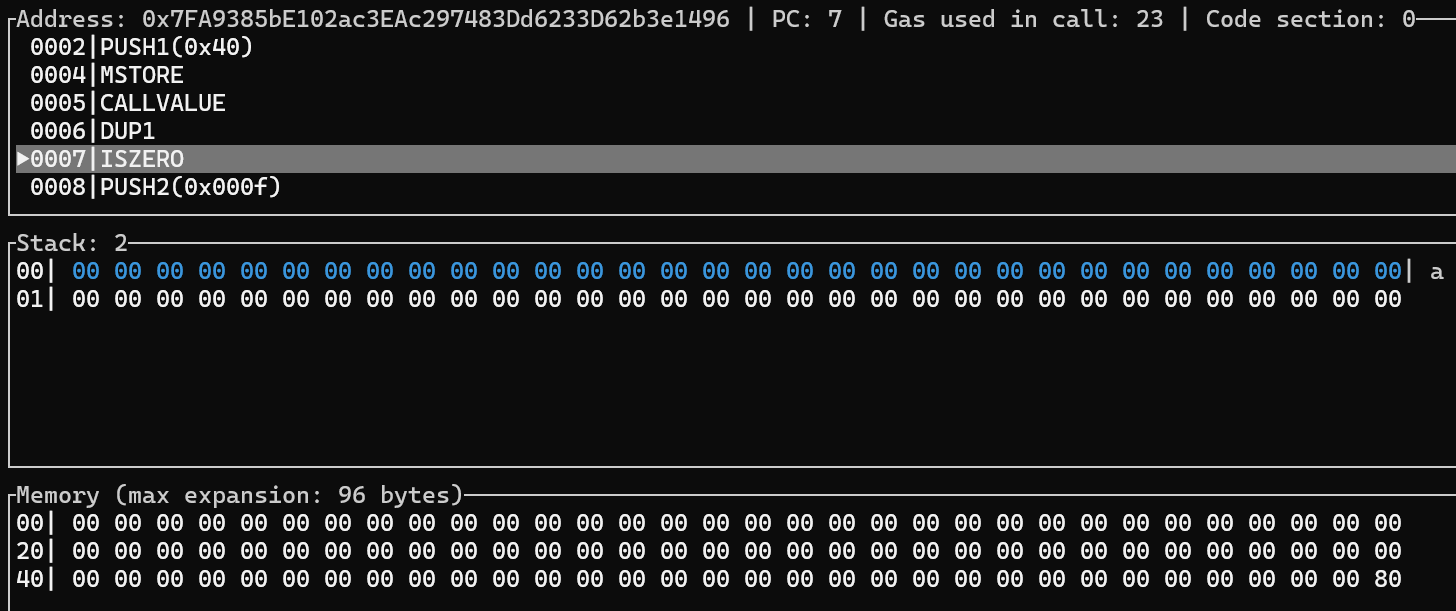
执行6:
执行第6行语句:
func opIszero(pc *uint64, interpreter *EVMInterpreter, scope *ScopeContext) ([]byte, error) {
	x := scope.Stack.peek()
	if x.IsZero() {
		x.SetOne()
	} else {
		x.Clear()
	}
	return nil, nil
}
- 判断栈顶元素是否为0,如果是则设置为1。否则清空为0。
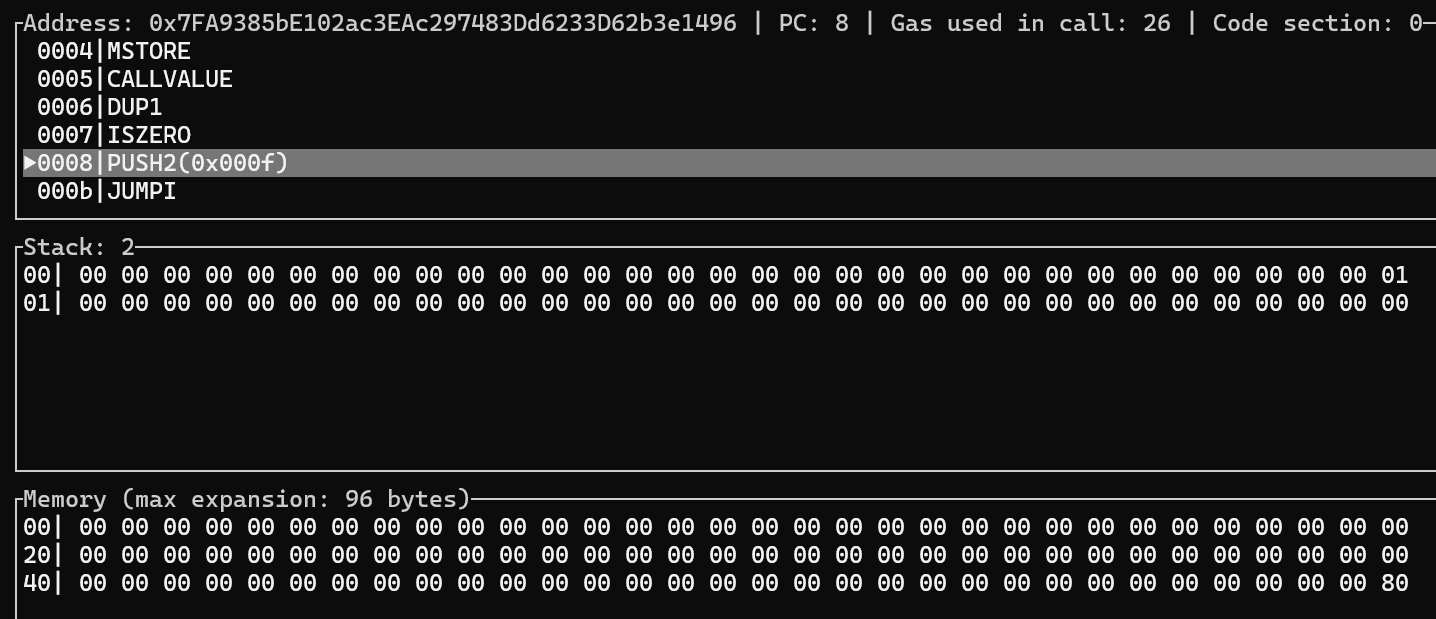
执行7:
执行第7行语句: 0x000f入栈
执行8~9:
执行第8~9行语句:
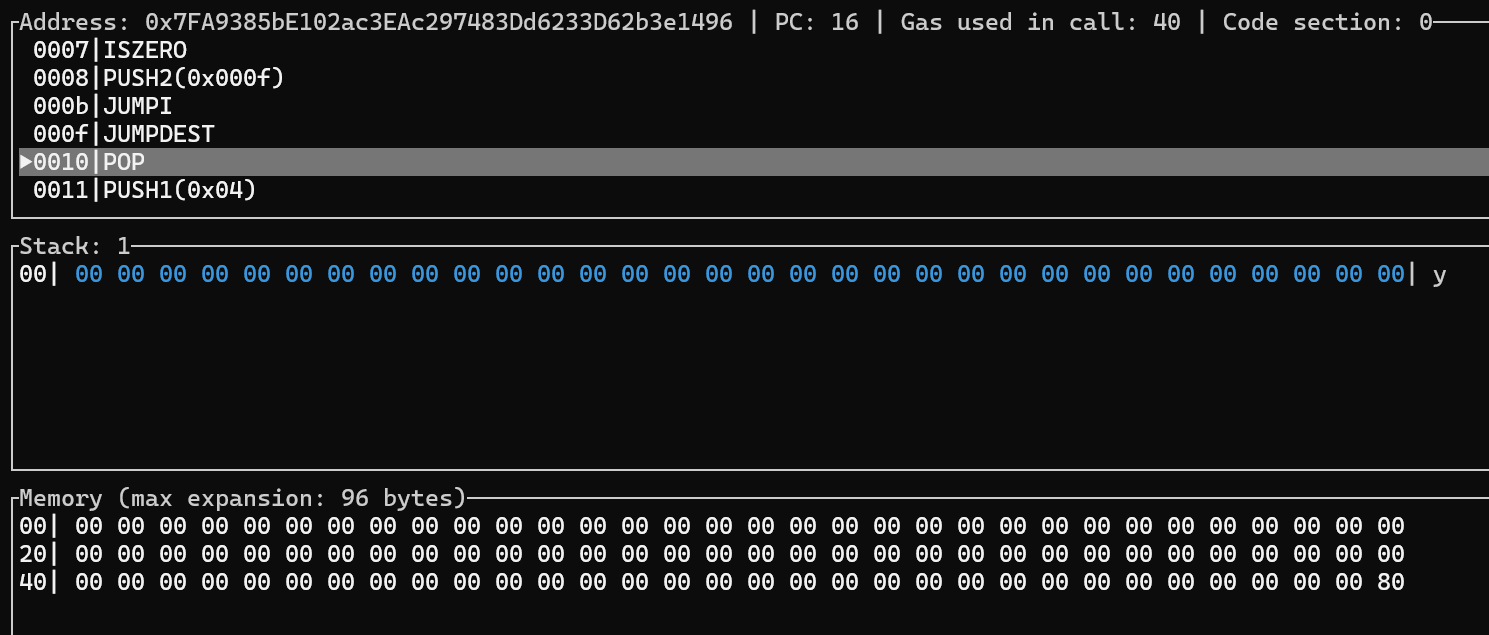
func opJumpi(pc *uint64, interpreter *EVMInterpreter, scope *ScopeContext) ([]byte, error) {
	if interpreter.evm.abort.Load() {
		return nil, errStopToken
	}
	pos, cond := scope.Stack.pop(), scope.Stack.pop()
	if !cond.IsZero() {
		if !scope.Contract.validJumpdest(&pos) {
			return nil, ErrInvalidJump
		}
		*pc = pos.Uint64() - 1 // pc will be increased by the interpreter loop
	}
	return nil, nil
}

...
func (c *Contract) validJumpdest(dest *uint256.Int) bool {
	udest, overflow := dest.Uint64WithOverflow()
	// PC cannot go beyond len(code) and certainly can't be bigger than 63bits.
	// Don't bother checking for JUMPDEST in that case.
	if overflow || udest >= uint64(len(c.Code)) {
		return false
	}
	// Only JUMPDESTs allowed for destinations
	if OpCode(c.Code[udest]) != JUMPDEST {
		return false
	}
	return c.isCode(udest)
}
...

...
func opJumpdest(pc *uint64, interpreter *EVMInterpreter, scope *ScopeContext) ([]byte, error) {
	return nil, nil
}
执行前,栈中元素:
0x0f
0x01
0x00
- 栈顶前两个元素出栈,如果第二个元素不为0,判断跳转位置是否有效,如果有小,程序计数器pc = 跳转pos - 1(即下一行执行跳转位置代码)
执行N
- 然后就像这样,跳一步,看一下源码(更快的方法,EVM操作码查表)。
- 这是一个很枯燥的过程,但是还是尽可能把一个case(一次合约调用)看完,理解透。多调试几次,完成以后一定会对EVM中智能合约会有一个全新的理解。
其他关GAS使用变化
- 注意观察在进行stack,memory和storage时gas消耗的数据。